How do you learn? Answer.....Usually, when something happens to you.....This post will not be of interest to most. But, if you pull any type trailer on a regular basis or Don't put much mileage on your car....It may be a worth while read.
We barrel race and pull a 4 horse trailer with Living Quarters. We had the tires rotated and bearings greased recently. There was one tire that was worn more than the others and that bothered us a bit. We carry Two spare tires, because they are 14 ply and they can't just be found anywhere when out on the road. We were getting ready to go to the Lucky Dog Barrel race in Searcy, AR. So, we decided to take the one tire off and put one of the spares on. The spare has never been on anything... That spare lasted.....almost 2 1/2 hours, when we heard a POP! We could NOT believe it was the spare. We put on the other spare. That spare tire made it to Searcy, (about 30 mins) and then almost another hour on the way home. POP! Are you kidding me! Neither time were we in a great place to be changing a tire that was on traffic side. Guess What? The tire that we originally pulled off the trailer, got put back on. Before, we took off again....I prayed! We didn't have another spare and it was Sunday.
So, this morning I decided to Google, How long do tires last? The articles that I found explained that a tire might Age Out, before the Treads Wear Out. So, that spare that has never seen pavement, may not be any good! Our spares were brand new in my eyes and most every other person that hasn't read up on tires.
The articles tell how to the read all those numbers on a tire. One of those numbers is a DOT number. The entire DOT number may be on only ONE side of the tire. Our spare had OJ 21XA4 4308. The last four digits are the ones of interest. They tell when your tire was made. Our tire was made the 43rd week of 2008. According to some of the articles tires should not age out till 6-10 years with proper maint. But, then you have to add in all the other factors, the sun, dry rot, heat, elements.... ..So, for some reason, I am feeling a little cheated. What happened to 6 - 10 years? Those tires were not in the sun, not in the heat, (trailer is kept in a garage) the elements were min, BUT neither lasted a trip. A man that we know that sells tires, said you should replace your tires every five years regardless....
Now, we need spares and the tires on the trailer were bought May 2010. We are about to get all new tires and use the three good ones taken off the trailer for spares... Ain't nobody got time for a Flat when on a trip with horses!
Safe Travels and Check the tire year out on your trailer tires and SPARE!
Barnominium

Monday, November 11, 2013

Tuesday, November 5, 2013
Junk to Garden Art
I found this little jewel, where else but my mom's driveway. They are moving to Arkansas and they had been throwing stuff out. I said, "If you don't love it, Don't take it with you." My parents had already gone back to the their other home. And, I can't remember why, but my oldest had left her truck there and I was dropping her off. I almost didn't pick it up and she said, "I can't believe you are not getting that." So, I did with no idea what the heck I was going to do with it. I didn't have the stand that it came off of...


I used some glue and just glued that little fan right back on.....still no idea what I was doing with it. Then, I decided that I was going to paint it, Brown center, yellow petals, and green fan, like a sunflower. Still no plan. And, I didn't spend a lot of prep time. I just knocked the off the loose stuff with a putty knife. When, I started spray painting it...I noticed some shape on the metal, like flower petals and a leaf. What the heck...I had no idea. Any way I was painting it in the yard by this tree. When it was dry, I moved it over there, just so it was out of the way. We ride horses, and it doesn't happen often or even once a year, but sometimes, one will get loose and it is a no brainer, they would run right into it and cut themselves. It found it's purpose.....Garden Art!

I took my mom out there, when she was here visiting and asked about it looking like petals and a leaf. She confirmed that was how it had been painted. Then, she said, "I am so jealous, I just couldn't see it being anything, but a windmill...." I told her she could take it home and put it her garden, but she declined and I am happy to keep it.


I used some glue and just glued that little fan right back on.....still no idea what I was doing with it. Then, I decided that I was going to paint it, Brown center, yellow petals, and green fan, like a sunflower. Still no plan. And, I didn't spend a lot of prep time. I just knocked the off the loose stuff with a putty knife. When, I started spray painting it...I noticed some shape on the metal, like flower petals and a leaf. What the heck...I had no idea. Any way I was painting it in the yard by this tree. When it was dry, I moved it over there, just so it was out of the way. We ride horses, and it doesn't happen often or even once a year, but sometimes, one will get loose and it is a no brainer, they would run right into it and cut themselves. It found it's purpose.....Garden Art!

I took my mom out there, when she was here visiting and asked about it looking like petals and a leaf. She confirmed that was how it had been painted. Then, she said, "I am so jealous, I just couldn't see it being anything, but a windmill...." I told her she could take it home and put it her garden, but she declined and I am happy to keep it.

I think next year it is going to be cute there with some other flowers!
Monday, November 4, 2013
Burlap Curtains- SO EASY!
We bought a second home over in AR two years ago. If you have been following along than you know this.....Decorating is on a beer/NO budget. We are by no means, Rich, so I have tried to furnish, decorate, fix up with as little money as possible. Now, Our youngest is in college and College, room and board is over the top. Now, the budget is almost a big 0.....LOL! Now, that we are officially in year two, the projects and decorating continue. Just gotta do what you can do.
The Dining Room, I would say, is getting close.....There is one of the biggest Plate Glass windows, that I have ever seen in this room. And, It has a great view....NOT of the sunroom and a door. You know curtains are Expensive. Burlap is all the rage....and I have seen them all over the web....and you know Burlap is cheap. I've seen pictures and pictures, but not really any directions, so you've lucked up. I am going to show you how, I did mine.
 This is the window with the lovely view. Also, pictured is my Craigs List find, table with 6 chairs, for $175. Yes, I painted the chairs. They were a mess. For more details check under Painted Furniture.
I have seen pictures with curtains on branches, and on different types of rods. I decided to go branch hunting. I found the Perfect Branch, the perfect length....Until I broke off the small end...Sanding on it. So, the next best thing. I cut it and left a gap between the two sides.
Now, for the curtains....Easy Peesy...If, I can do it, anyone can!
 Ok, this picture, is showing something else, BUT do you see the string, that I am pulling? Burlap DOES NOT cut straight. So, when you measure out the length that you need, pull one of the strings, completely out and then make your cut in the gap left. A lady at Walmart showed me this....
Measure the length of curtain needed for your window. I think that they look better hung higher as shown in my photo. It also makes your window look larger. Add a half an inch for your seam at the top. I used the 3/8 in Heat Bond Hem. https://amzn.to/3TFhQbZ I turned over the edge at the top only and ironed. I couldn't decide what I was going to use to attach.....I fly by the seat my pants a lot and according to others I fly on a broom...Ha!
 I used a Jute Twine, and it can be found here. https://amzn.to/42wKIXU Or it can be found in the Hardware store, on the aisle with ropes, chains, etc. Or in a Hobby Store. It comes in different sizes. This is not the smallest and not the largest.
The Dining Room, I would say, is getting close.....There is one of the biggest Plate Glass windows, that I have ever seen in this room. And, It has a great view....NOT of the sunroom and a door. You know curtains are Expensive. Burlap is all the rage....and I have seen them all over the web....and you know Burlap is cheap. I've seen pictures and pictures, but not really any directions, so you've lucked up. I am going to show you how, I did mine.
I want to apologize for the low quality pictures. I got several with my camera, before it said, "Batteries are Exhausted," Really....thank goodness for phones.

I have seen pictures with curtains on branches, and on different types of rods. I decided to go branch hunting. I found the Perfect Branch, the perfect length....Until I broke off the small end...Sanding on it. So, the next best thing. I cut it and left a gap between the two sides.
 | ||
| This is how we attached the branch to the wall, screw and wire. |
Measure the length of curtain needed for your window. I think that they look better hung higher as shown in my photo. It also makes your window look larger. Add a half an inch for your seam at the top. I used the 3/8 in Heat Bond Hem. https://amzn.to/3TFhQbZ I turned over the edge at the top only and ironed. I couldn't decide what I was going to use to attach.....I fly by the seat my pants a lot and according to others I fly on a broom...Ha!

If you wanted a cleaner or less rustic look, use curtain rings with hooks, like these https://amzn.to/3TydJi1
 You can see the top edge better here folded over with the heat bond. I cut my twine 20", so I would have enough to tie. Find the center point of the twine 10" and sew to the corner of fabric and then I placed one every 7 1/4".
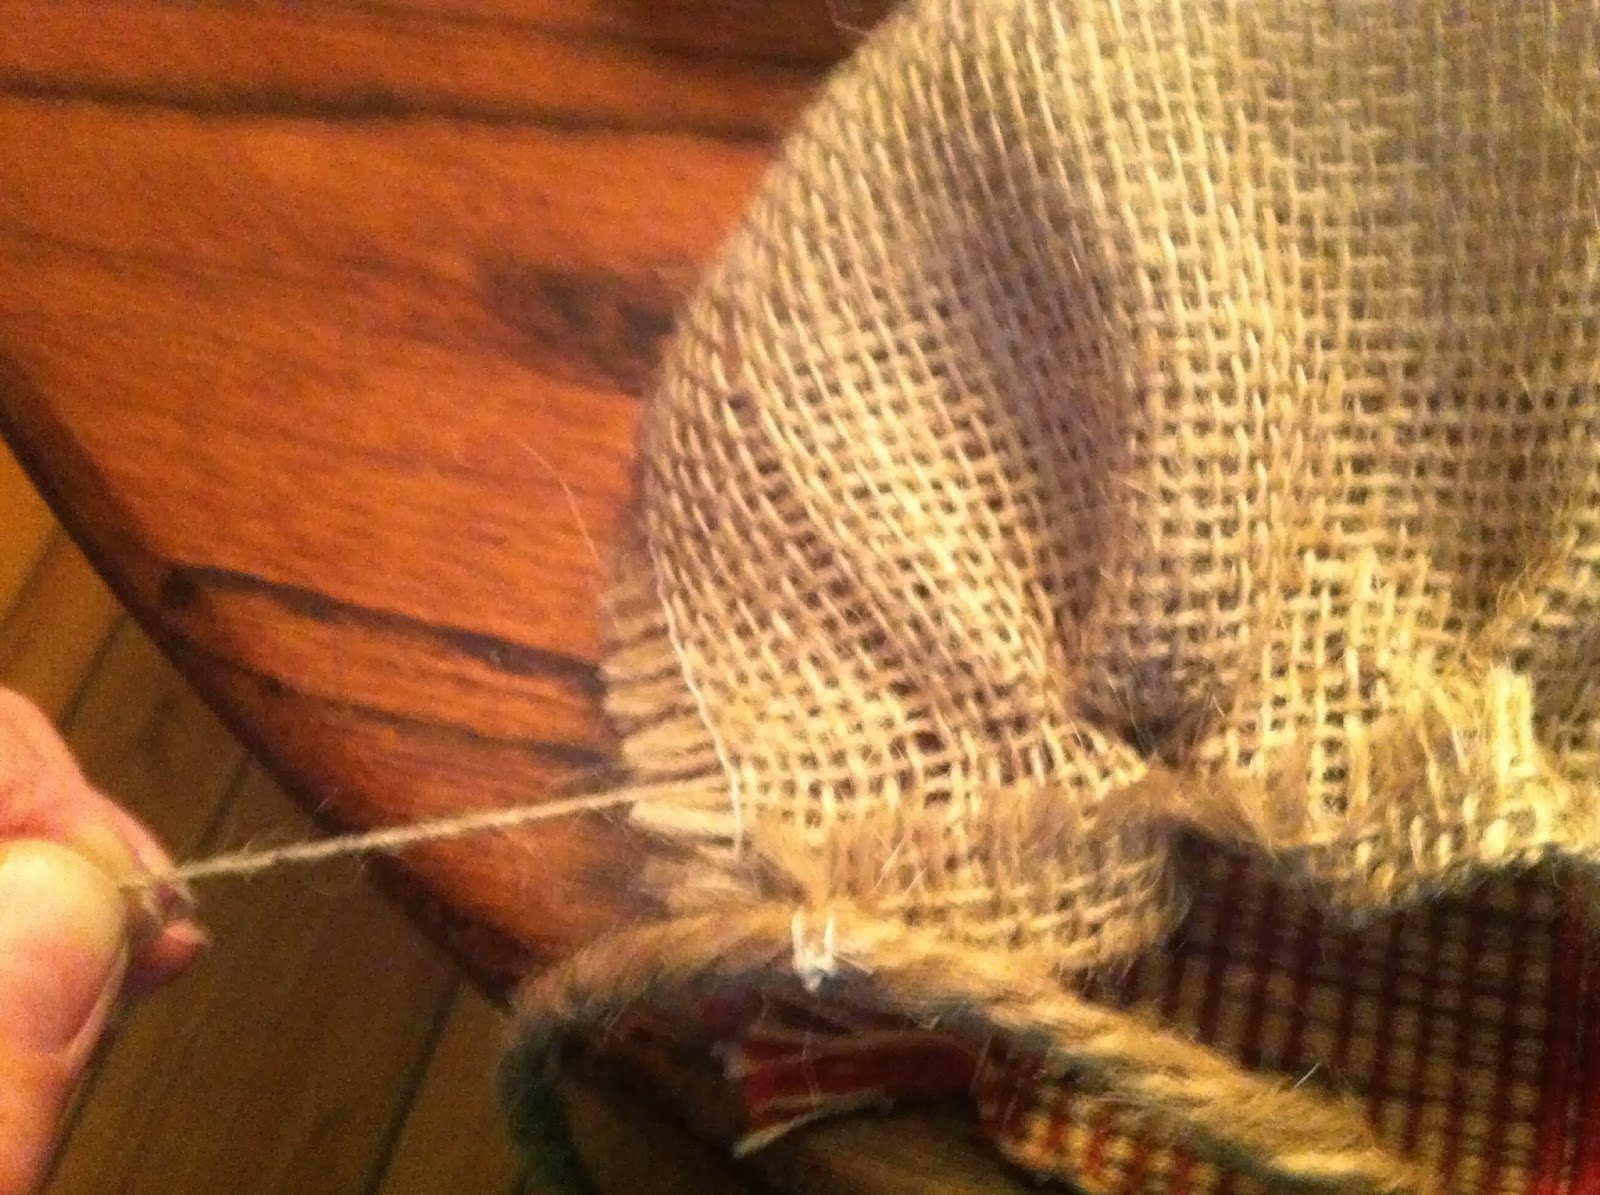
Now, back to this picture. I wanted my curtains puckered at the top. Some of the pictures that I have seen of burlap curtains just don't look like they hang well. So, I picked a string near the top of curtain and pulled, (be careful or you can pull it all the way out) Pull string and work your fabric into a pucker. You can locate the string on the other end and pucker your fabric from that end as well. I then tied several knots in the string and cut off the excess.
 Tie them on your stick. Some of twine will be longer than others, unless you find a stick that is straight as arrow...I haven't decided about what I want to do with extra, leave it, cut it off, fray the ends....What do you think? Let me know.
 After, I had them tied up, the curtains wanted to flair out. I worked on my pleats and tied them back for awhile. Burlap is stiff!


Now, back to this picture. I wanted my curtains puckered at the top. Some of the pictures that I have seen of burlap curtains just don't look like they hang well. So, I picked a string near the top of curtain and pulled, (be careful or you can pull it all the way out) Pull string and work your fabric into a pucker. You can locate the string on the other end and pucker your fabric from that end as well. I then tied several knots in the string and cut off the excess.


Here they are.....Finished!
I have found that one project always leads to another. I have so many in my head, I just can't get to them all. But I want to do a Stained-glass window to hang in the middle...to hide that wonderful view of the sunroom door.
As an Amazon affiliate, I may receive a commission an any links!
If you run across this post, come on over to Simplebutfabulous.com. I am back to writing and will be forwarding some of the popular post from here and new content.
Subscribe to:
Posts (Atom)