
This one is the second bath in my AR home. It comes off of the guest bedroom, (which is nice for guest) but when I have a full house, it leaves the rest of us with just the main bath. I would love a complete gut job, and we will do that one day. But, like many of you, it just isn't in the budget at this time. So, This is a Make it Do makeover. It was a ugly color, the vanity and top was really outdated and to big (Tight space to get into bath) My vision, for this bath is to close off the current door and move the door to come off the hall. Then the vanity could be moved to make the bathroom more open and accessible.
 |
 |
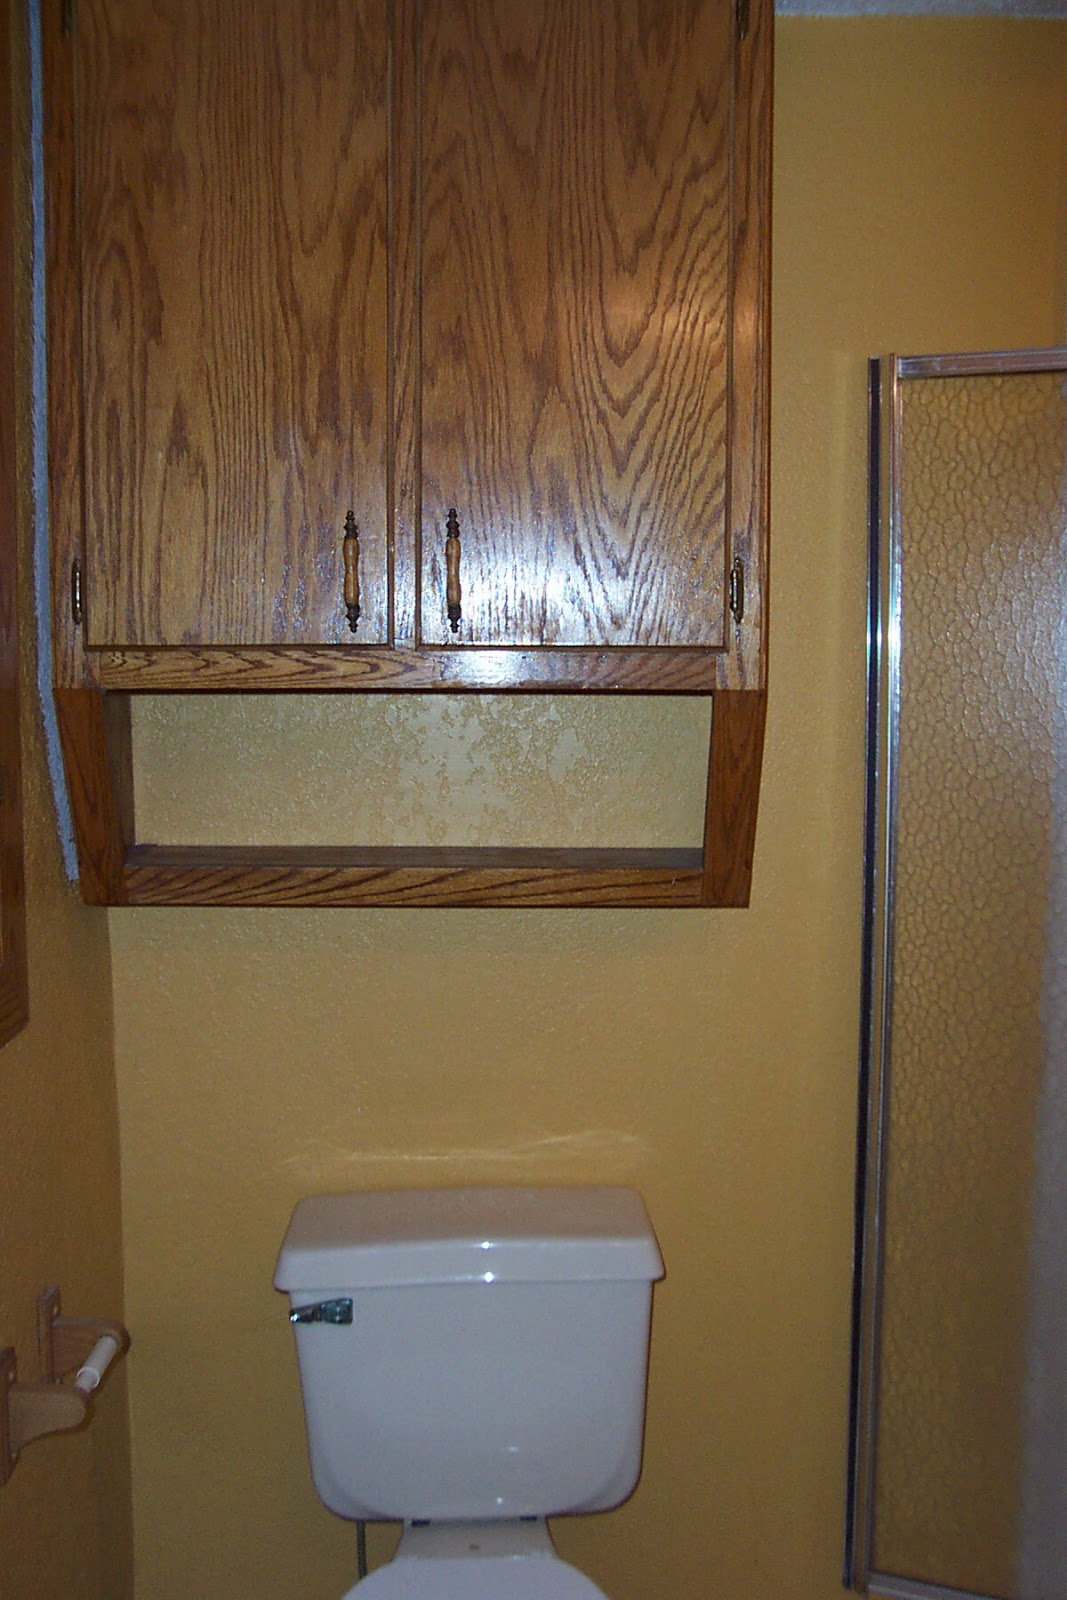
More home made woodwork and it is nailed to the wall or I would take it down. Use Screws people, They hold better and you can move something it you want to .
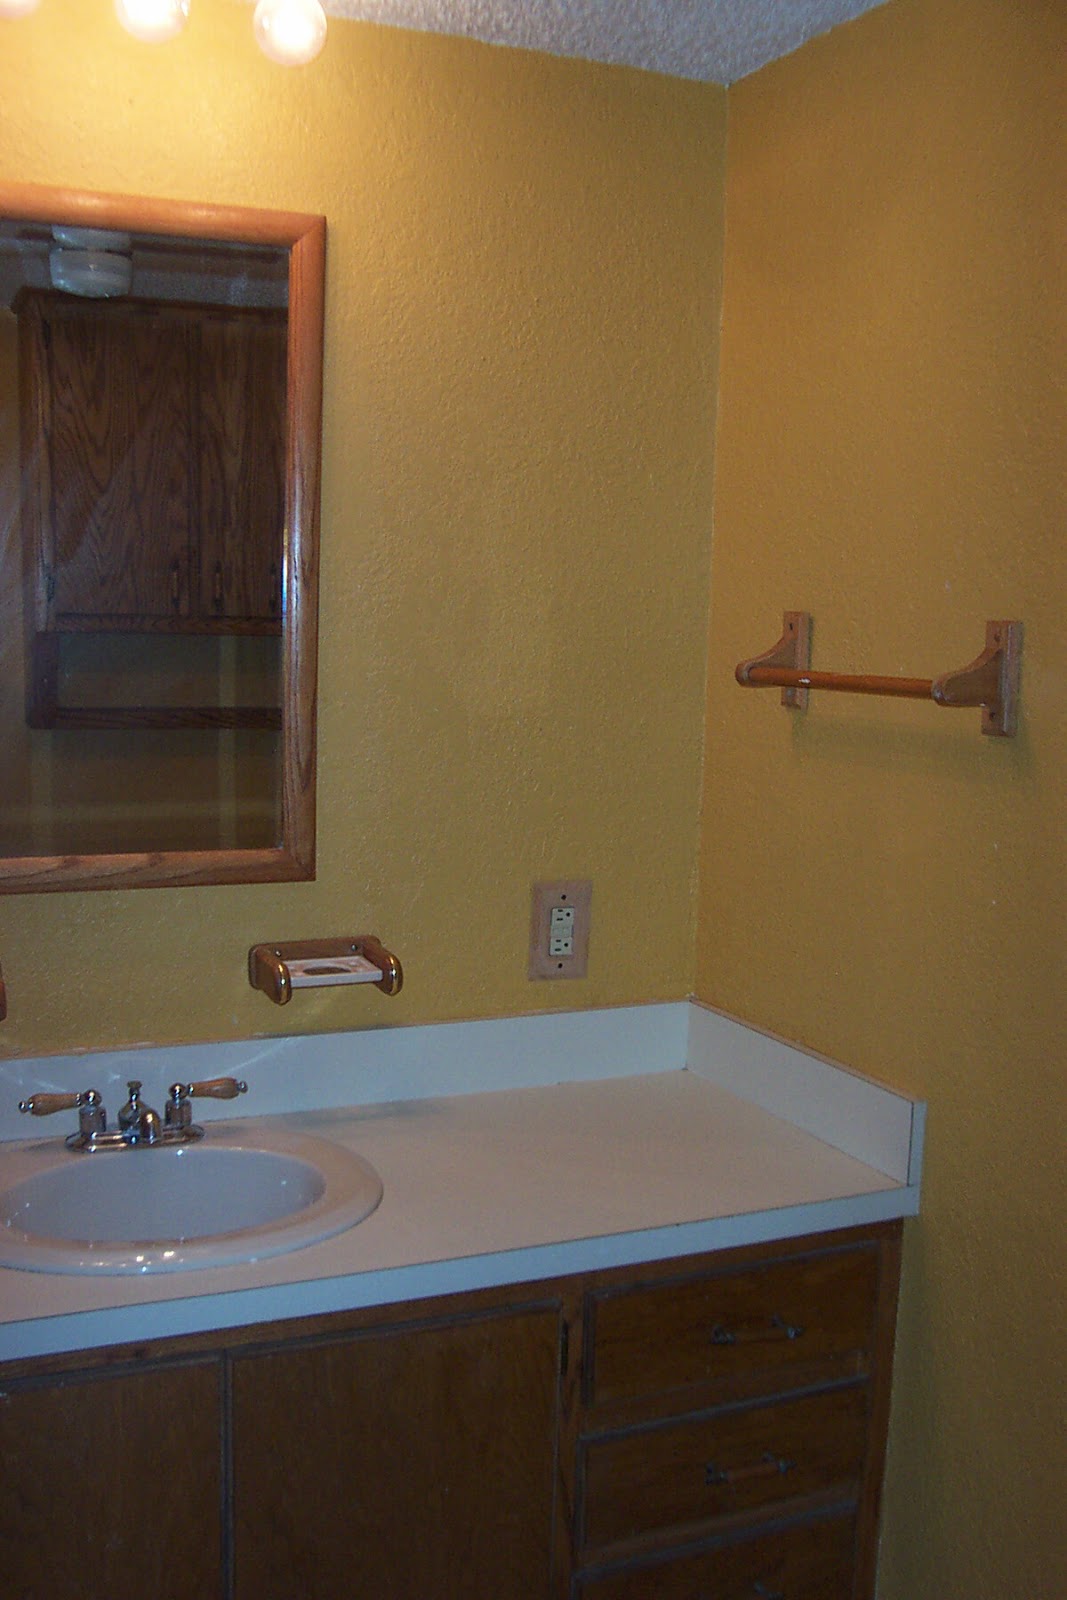
This vanity is huge for this room! OH, I was going to replace the mirror, it must be glued to the wall, so it is staying until we get ready for a complete overhaul. NOW, you know, your bathroom is not the only poorly designed, ugly bath. The old wood towel bar and tooth brush holder. Gone!

First, I removed the hardware. Then I used my dry brush technique and painted the cabinet. I wanted it to look rustic. Then, I took some sandpaper to the edges and distressed it. Now, this made the color of the vanity worse......UGH! I had to do something. Sometimes one project leads to another.
 |
| See cream and white, NO! So I decided, To Paint! |

I taped everything off. Cleaned the top with a household cleaner. Then I used a Highly Adhesive Primer (I will get the name of it on my next trip over) I really didn't have a plan....Flying by the seat of my pants. I had some black paint, so black it was.

Then, I decided, I will make it look textured. I had several different Brown paints. So I found my sea sponge and sponged it out till I was happy. After the paint dried, I gave it several coats of Polyurethane Spray.
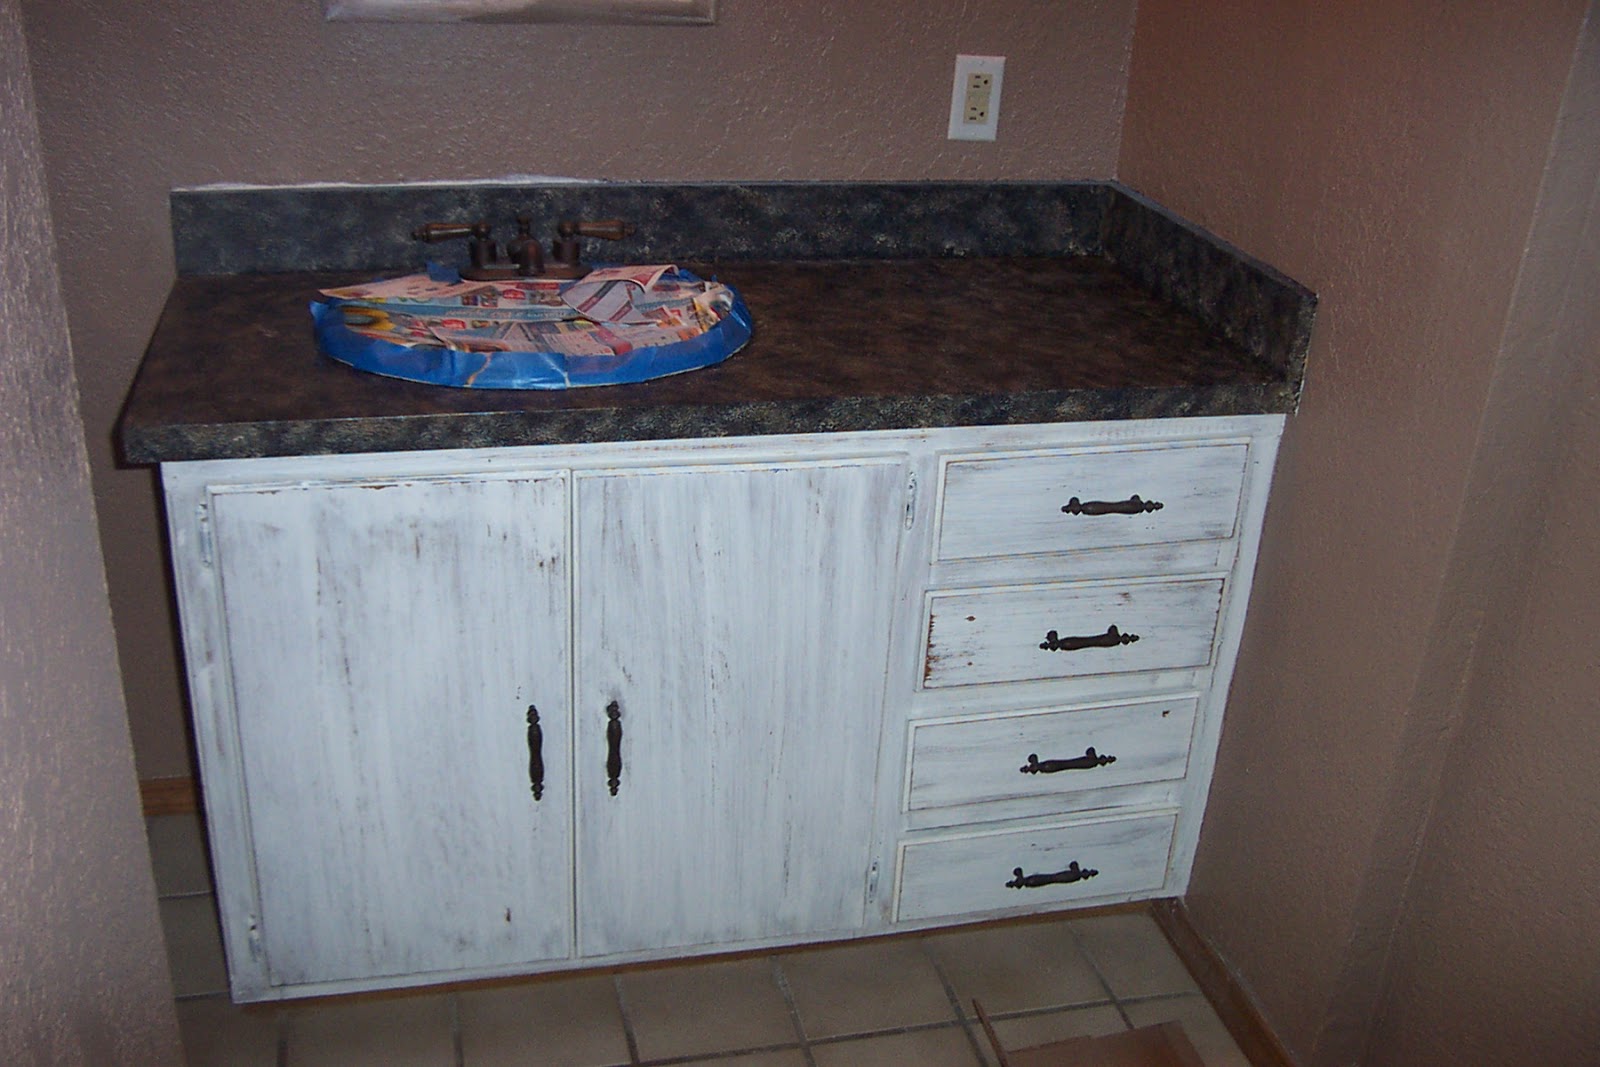
OMG, the hardware was outdated and had wood insets in the middle. I didn't want to invest in new ones at this time. So, PAINT! First, I sprayed them Black, tops & bottoms. Them I took a Can of Metallic Copper and gave them a light misting.
 |

I get all this done, then realize that the faucet is bad, chrome, flaky, ugly. Again, at this time I did not want to invest in new plumbing.....and certainly not have to ask my husband to change it out. So, what, PAINT! I gave it the same treatment as the cabinet pulls. It really looks better. I mean I can live with it for a while.

I took down all the old wood hardware, Towel Bars, Toilet Tissue Holder and put up new Rubbed Bronze ones. I found a Soap dispenser and Toothbrush holder at the Dollar Tree.(a nice one) And I painted out the mirror too. I just realized I don't have a picture, so I will have to update with one.
And I painted the door to match the guest bedroom furniture and we added new hardware.
Again with the Dry Brush Technique.
 | |||||||
| Now, I feel it is more guest ready! A fresh clean look! |
************************************************************************************
This is the downstairs bathroom in the barnominium. I thought this was cute when I did it, but like every thing, there comes a time for change.
 |
 |
| Hardware that came on the cabinet. |
 | |
| New shower curtain, and I changed out the border. |
 |
 |
| I painted the white door and painted the hooks. |
Then at a later time, I found the mirror frame idea on Pinterest, so I decided to give it a try.
It was quite easy, I did it by myself.
You need: Trim, Liquid Nails, A Miter Saw, tape measure, Paint or Stain. That's it.
First measure your mirror, Then you will measure out your first piece of trim. This is the tricky part, make sure you make you cuts, so the longest points are on the outside part of trim. Now go make sure it fits. Now you can cut your other 3.
I painted my trim. Make sure you paint at least 1/2 inch of the back side to, because it reflects off the mirror. Then, I applied the Liquid Nails to cut edges and put it together and left it alone.......and hoped it wouldn't fall apart when I moved it. It Didn't. OK, you checked your first piece, but take the frame in and make sure it really does fit. Then apply the Liquid Nails to the back of the frame, kinda in a wavy line. (My husband helped me here) Then carefully put it on the mirror and firmly push on the frame all the way around. Then, I just left it.

 |
| What a change! I've got a couple of more to do now! |
 |
| I did buy a new faucet for this vanity. |
I have had a busy weekend. My daughter left Friday morning to go to Gatlingburg for the TN FFA (Future Farmers of America) convention. It is known to happen....When someone is gone for a few days, it is a great time to redecorate. I had asked, and asked, "What color do you want your make-up room?" Her response, "I am going to college in a couple of months." I say, "It is time for a change." Yep, that is what happened....I painted, I cleaned and I threw away about a 100 lbs of crap. Does ANY one else have daughters that are hoarders? Both of mine are! My oldest has been gone for 7 years and still had stuff in the drawers. Gone....in the garbage! And the youngest had stuff in her drawers that was 7 years old too....When she was 11 years old.....Ugh, I can't believe they cannot get rid of stuff.
Check out some of stuff in these drawers....I was horrified!
 | |
| Two hair dyers, I have bought 2 since these were bought....Why? |
 | |
| 7 Mascaras, Mom I need a Mascara....But never throw away an old one! |
 | |
| Stuff and hair things for little girls.... |
 | |
| Stuff and more |
 |
| I organized! |
 |
| Wow, all nail stuff in one drawer! |
The Old Look!
 |
 | |
| It was cute...but time for a change. |

I had some flowers here on the wall with some of that wall tape, that is suppose to come off, well it did and took some wall with it. I had to prepare my walls before painting.

 |
| A little spackle |
 |
| Smooth it out and sand when dry |
The NEW Look!


I made this with a piece of picture canvas. I painted it and then screwed in little cup holders across the bottom. She has a lot of necklaces. Where were they? On hooks, in drawers, in bags......She doesn't even know what she has. Jewelry still in their boxes.

She will be surprised when she gets home. And next week while she is on Spring Break....We are cleaning out a closet.
Next, Frame the mirror and reupholster the stools! I will show pictures when I get it done!
***************************************************************************
No comments:
Post a Comment