
The Dining Room, I would say, is getting close.....There is one of the biggest Plate Glass windows, that I have ever seen in this room. And, It has a great view....NOT of the sunroom and a door. You know curtains are Expensive. Burlap is all the rage....and I have seen them all over the web....and you know Burlap is cheap. I've seen pictures and pictures, but not really any directions, so you've lucked up. I am going to show you how, I did mine.
I want to apologize for the low quality pictures. I got several with my camera, before it said, "Batteries are Exhausted," Really....thank goodness for phones.

I have seen pictures with curtains on branches, and on different types of rods. I decided to go branch hunting. I found the Perfect Branch, the perfect length....Until I broke off the small end...Sanding on it. So, the next best thing. I cut it and left a gap between the two sides.
 | ||
| This is how we attached the branch to the wall, screw and wire. |
Measure the length of curtain needed for your window. I think that they look better hung higher as shown in my photo. It also makes your window look larger. Add a half an inch for your seam at the top. I used the 3/8 in Heat Bond Hem. https://amzn.to/3TFhQbZ I turned over the edge at the top only and ironed. I couldn't decide what I was going to use to attach.....I fly by the seat my pants a lot and according to others I fly on a broom...Ha!

If you wanted a cleaner or less rustic look, use curtain rings with hooks, like these https://amzn.to/3TydJi1
 You can see the top edge better here folded over with the heat bond. I cut my twine 20", so I would have enough to tie. Find the center point of the twine 10" and sew to the corner of fabric and then I placed one every 7 1/4".

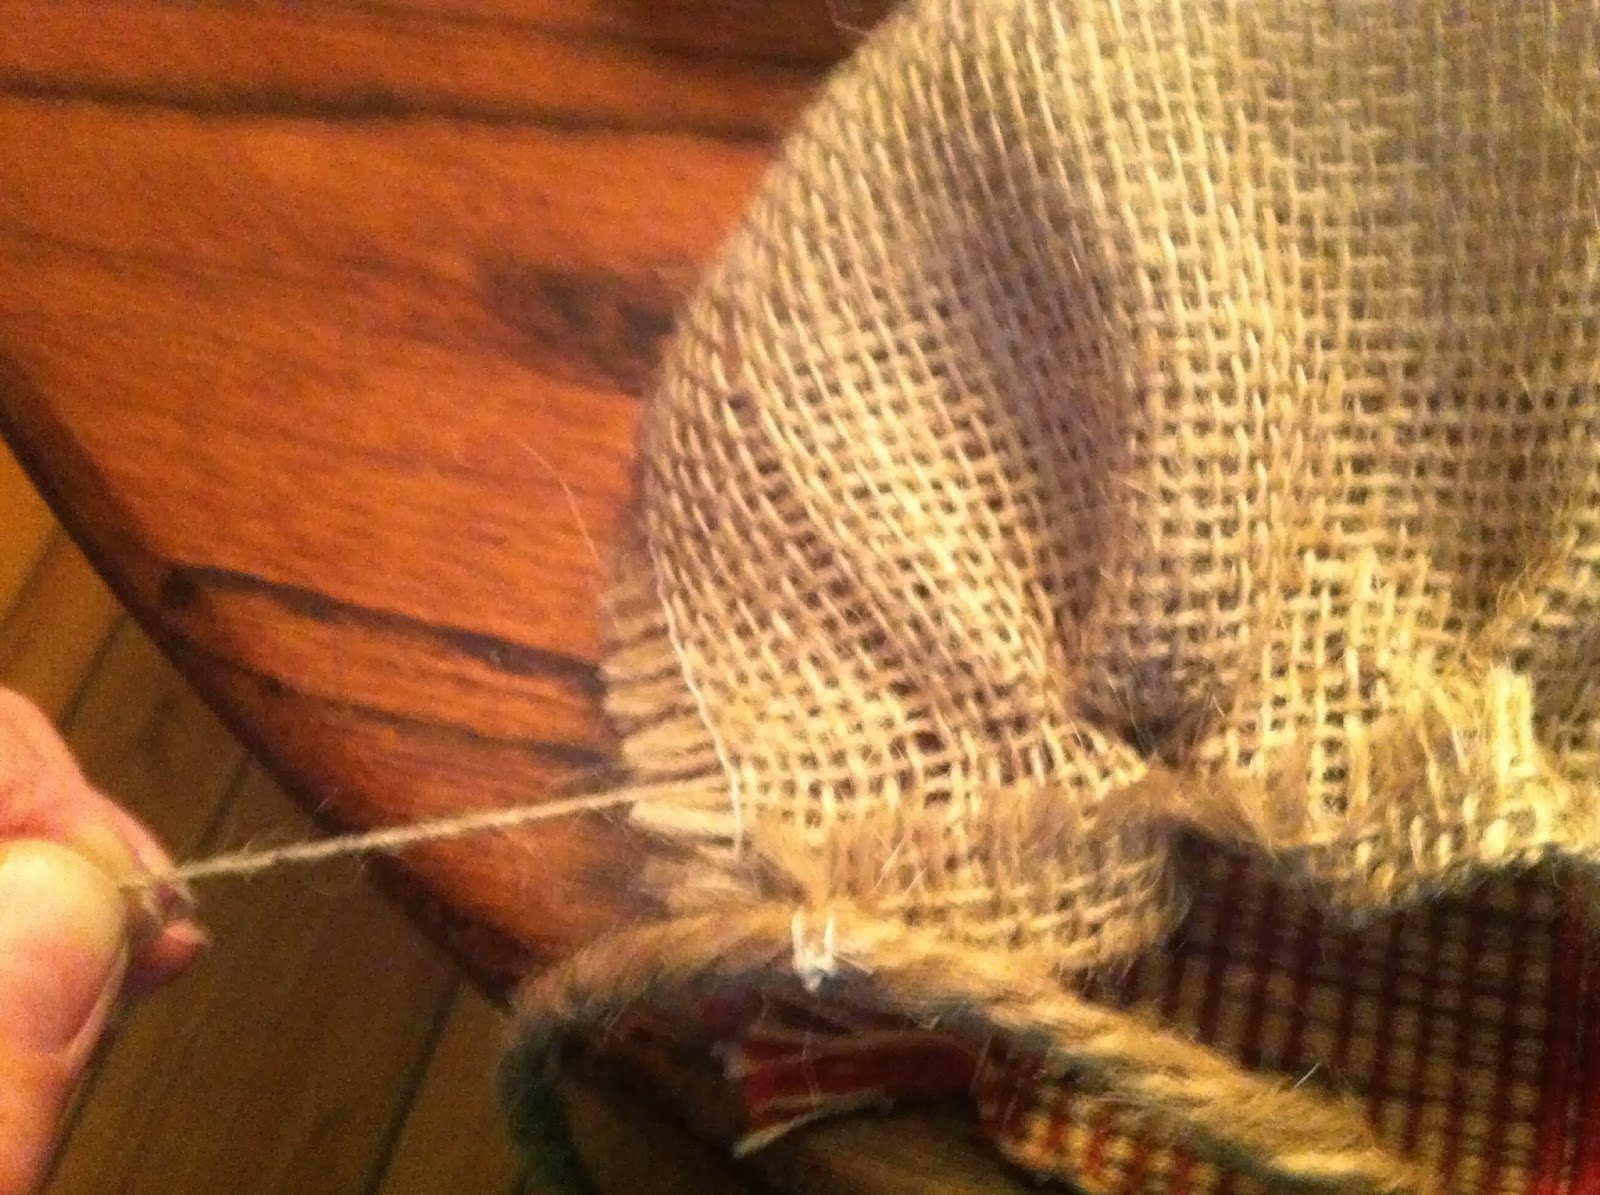
Now, back to this picture. I wanted my curtains puckered at the top. Some of the pictures that I have seen of burlap curtains just don't look like they hang well. So, I picked a string near the top of curtain and pulled, (be careful or you can pull it all the way out) Pull string and work your fabric into a pucker. You can locate the string on the other end and pucker your fabric from that end as well. I then tied several knots in the string and cut off the excess.
 Tie them on your stick. Some of twine will be longer than others, unless you find a stick that is straight as arrow...I haven't decided about what I want to do with extra, leave it, cut it off, fray the ends....What do you think? Let me know.
 After, I had them tied up, the curtains wanted to flair out. I worked on my pleats and tied them back for awhile. Burlap is stiff!


Now, back to this picture. I wanted my curtains puckered at the top. Some of the pictures that I have seen of burlap curtains just don't look like they hang well. So, I picked a string near the top of curtain and pulled, (be careful or you can pull it all the way out) Pull string and work your fabric into a pucker. You can locate the string on the other end and pucker your fabric from that end as well. I then tied several knots in the string and cut off the excess.


Here they are.....Finished!
I have found that one project always leads to another. I have so many in my head, I just can't get to them all. But I want to do a Stained-glass window to hang in the middle...to hide that wonderful view of the sunroom door.
As an Amazon affiliate, I may receive a commission an any links!
If you run across this post, come on over to Simplebutfabulous.com. I am back to writing and will be forwarding some of the popular post from here and new content.
Good work, well detailed and explained by the author. Hoping that it will inspire more readers. Thank you for sharing this. Want to have some changes try to visit how to get wrinkles out of curtain
ReplyDeleteThank you so much for the kind words!
DeleteGreat instructions! I’m sending to a friend who is currently decorating. I think your clear instructions will be a big help to her! Also, great find on your table and chairs! You might think about going ahead and painting the chairs legs also. You’re really pulling the room together!!
ReplyDeleteThank you so much for leaving a message! The burlap was one of my favorite project! Did you happen to see the paint drop cloth ones that I did for the sunroom? Sadly we have sold that home, but I’ve been busy elsewhere.
DeleteThank you so much for leaving a message! The burlap was one of my favorite project! Did you happen to see the paint drop cloth ones that I did for the sunroom? Sadly we have sold that home, but I’ve been busy elsewhere.
DeleteI love these! May use in the Fair Cabin!
ReplyDeleteFor best curtains designs and accessories visit:
ReplyDeleteBest Curtains and blinds
Thanks for sharing! I want to do a burlap valance for the kitchen door, and I think this will be perfect!!
ReplyDeleteThank You!
DeleteADORBS
ReplyDeleteIf you're in Doha and looking for premium-quality aluminium Venetian blinds, you've found the right place! I recently upgraded my home with these blinds, and I couldn't be happier. The durability and elegance they bring to my windows are impressive. Don't miss out on this fantastic opportunity to elevate your decor!buy aluminium venetian blinds in doha
ReplyDeleteThank you for your post. This is excellent information. It is amazing and wonderful to visit your site. If you are looking forStage curtains then contact us for reliable products in affordable price.Stage curtains are essential for creating the right atmosphere in theaters, auditoriums, and performance venues.
ReplyDelete